


11-28-2008, 12:31 AM
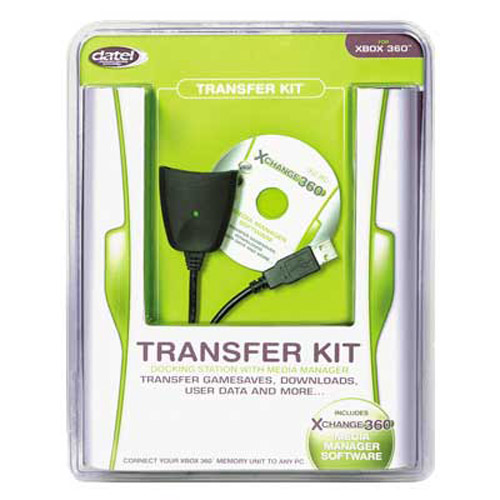
Xbox 360 Transfer Kit
Fuente: <!-- m --><a class="postlink" href="http://www.datelcustomerservice.com/Xbox%20360/Xbox%20360%20Transfer%20Kit.htm">http://www.datelcustomerservice.com/Xbo ... %20Kit.htm</a><!-- m -->
1.) Can I use the Xchange 360 software to transfer game saves?
2.) The backup button in the Xchange 360 software is not illuminated.
3.) How do I install the Xchange 360 software?
4.) How do I transfer a Memory Card image (.z36 file) to my Memory Card?
Q: Can I use the Xchange360 software to transfer game saves?
A: The Xbox 360 Transfer kit may be used to create a backup image of your Xbox 360 Memory Unit, or to write an image created in this manner to your memory unit. In the first case, all information on your memory unit will be backed up as one file, and stored on your PC. You may keep this file as a backup, or send it to friends over the internet. In the second case, all information from one of your previous image files or an image file of some else’s card will replace what is currently on your memory unit. When restoring an image file, please be sure to backup your memory unit first if there is any data on it that you wish to keep.
Q: The backup button in the xchange 360 software is not illuminated
A: To use the Xbox 360 Transfer Kit properly, Windows must recognize the docking station and memory unit as two separate devices in the Device Manager, both of which should be named “Xbox 360 Memory Unit”. To access the Device Manager and verify these devices, please follow the steps below.
Please Note: The following instructions are for Windows XP users. Earlier versions of windows may have slightly differing menus or choices. Some of these changes may be noted in italics following each step that is different.
Step 1:
Right-click on the desktop icon labeled “My Computer.” If this icon is not located on your desktop, or is a shortcut, check for one in your Start menu. A small grey menu should be displayed, choose Properties from this menu.
Step 2:
Select the Hardware tab from the tabs displayed at the top of this window, and then the Device Manager button from the resulting screen.
Some versions of windows may not have a Hardware tab, but the Device Manager button should be visible on the main window in this case.
Step 3:
Examine your Device Manager to find the device names assigned to your Transfer Kit. To verify you have found the correct device, or to assist you with finding the proper name, remove the memory card from the USB docking station. The device names assigned to the Transfer Kit will disappear from the list, and reappear when the card is reconnected. A properly installed unit will appear as two devices in the category USBIO controlled devices, and both devices should be named “Xbox 360 Memory Unit”. If one or both of the device names assigned to the Transfer Kit does not fall in this category, please follow the manual driver installation instructions listed below for each of the improperly installed devices.
Q: How do I install the Xchange 360 Software?
A: Right-click on one of the improperly assigned device names and choose Properties. Choose the Driver tab from the resultant window, and then the Update Driver or Reinstall Driver button.
You should now have begun the Update Device Driver wizard.
Step 1:
You may be asked to allow windows to connect to Windows Update to obtain the driver, choose “No, not this time” and select Next.
This beginning screen may also ask you to choose between allowing windows to search for the driver and choosing the driver from a list or specific location. Choose the second option (advanced).
Step 2:
Next you will be asked to specify where you would like windows to search. Choose the last option, “Don’t search, I will choose the driver from a list.”
In place of this step or during one of the following steps, you may be prompted to choose the device type. Choose USBIO Controlled Devices, Universal Serial Bus Controllers, or Other Device. If at any time the window you have reached displays a button labeled Have Disk, make no other choices and proceed to step 3.
Step 3:
On the following screen you should see a button labeled Have Disk. Select this button.
Step 4:
A smaller window will pop up labeled “Install from manufacturer’s disk.” Click the Browse button in this window.
Step 5:
A larger window will pop up with a folder listing. Use the pulldown menu at the top to select C:\Local Disk as your start point (This is your PC hard drive). Your hard drive may also be named something else, such as your computer manufacturer. If you have difficulty finding it, start at My Computer and select the first option that starts with C:\
If no pulldown menu is available, use the back button (a folder with an up arrow drawn on it) to travel to your hard drive’s main directory. A selection for the hard drive may also be off to the side of the window, or you may find a My Computer button from which you may proceed as directed above. You will be looking for the Program Files folder, so if this is displayed in the window you are looking in the correct place.
Step 6:
Double-click the Program Files folder. (Folders should be listed in alphabetical order) Next, Double-click the Datel folder, then XChange 360.
If this folder is not available, please ensure you have first installed the XChange 360 software from the disc included with your Transfer Kit.
Step 7:
Double-click the file x360mu.inf
Step 8:
The folder browser should automatically close. Select OK from the “Install from manufacturer’s disk” window, and select Next from the Driver Update Wizard window, to which you should have returned. Windows should begin copying files, and then prompt you to click the Finish button to end the driver installation.
If there is a second improperly assigned device name, please repeat these steps with the second device. If both device names are now “Xbox 360 Memory Unit”, you should now be able to use the Xchange 360 software normally. Start the software, and see if the backup button is now available when the Memory Unit is connected to the docking station. If not, try restarting your PC, as the software may not have properly been updated if it was open during the driver installation process.
Q: How do I transfer a Memory Card image (.z36 file) to my Memory Card?
A: To transfer a memory card image (.z36 file) to your memory unit, please follow these steps:
Ensure you are using a .z36 file, and not a .zip or other type of file
Open your Xchange 360 software, and choose the Yellow (Options) tab
Click the Folder Icon button, and browse for the folder containing the .z36 file you want to use. For instance, if the .z36 file is on your desktop, browse for the folder named “Desktop” and select it as your default folder.
Choose the Blue (Hard Drive) tab next, and click on the memory card image you wish to transfer.
Click the button labeled “To Mem” to send the image to the memory unit.


